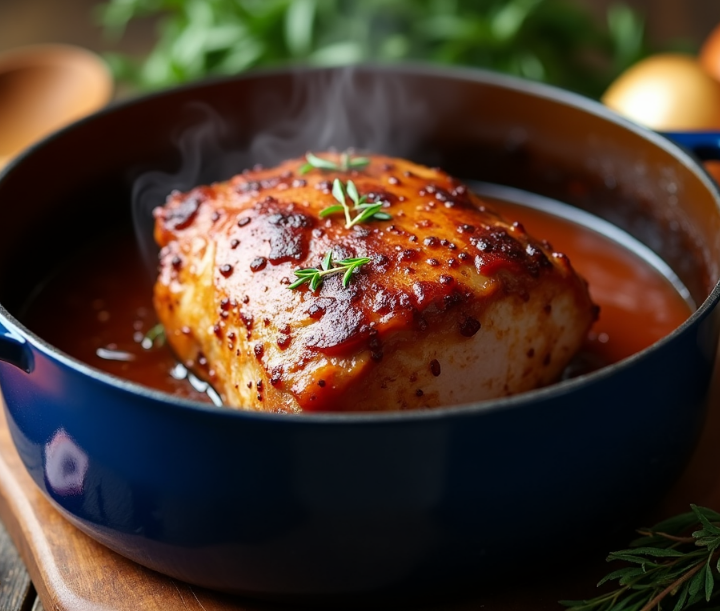
Braising pork demands almost 4 hours from start to finish, but this classic cooking method turns a simple 2-pound pork shoulder into an amazing feast. The dish easily serves 4 people and leaves you with plenty of tasty leftovers.
The real magic happens when the pork’s rich nutritional profile shines through – each serving delivers 43 grams of protein with incredible melt-in-your-mouth tenderness. On top of that, it combines red wine and beef stock to create deep, complex flavors that make this dish truly special.
You can make this perfect meal for a family gathering or plan your meals for the week ahead. We’ll guide you through this foolproof cooking technique step by step. Ready to create the most succulent pork you’ve ever tasted? Let’s get started!
Understanding the Braising Method
Braising is a timeless cooking technique that combines wet and dry heat methods to turn tough cuts into succulent meals. Simply put, this French-derived method (“braiser”) creates exceptional results through a two-stage process.
What Makes Braising Different from Other Cooking Methods
The unique approach of braising sets it apart from other cooking techniques. First, high temperatures sear the meat to develop rich color and seal in juices. Subsequently, slow cooking happens in a limited amount of liquid with the pot covered. This combination creates a distinctive cooking environment unlike any other method.
Unlike stewing, braising needs less liquid and works better with larger pieces of meat. Roasting uses only dry heat, while braising adds moisture that breaks down tough tissues. The braising method preserves flavors instead of diluting them like boiling does.
The braising process follows these steps:
- Sear meat at high temperature to develop color and flavor
- Add aromatics and vegetables to build complexity
- Pour in just enough liquid to partially cover the meat
- Cover and cook at low temperature (typically 300-325°F) for extended time
The cooking liquid changes into a rich sauce during this process, creating its own flavor system.
Why Braising Works Perfectly for Pork
Pork shoulder’s connective tissue and collagen make it perfect for braising. The slow cooking process breaks down these tough elements into gelatin, so the meat becomes tender and develops that melt-in-your-mouth texture.
The transformation happens as collagen dissolves into gelatin during extended low-heat cooking. Gelatin absorbs up to 10 times its weight in water and locks moisture throughout the meat fibers. You end up with fall-off-the-bone tenderness that a fork can “cut” with the gentlest pressure.
Pork’s natural characteristics make it ideal for braising:
- Pork shoulder’s fat melts during cooking and bastes the meat naturally
- The fat-side up position lets drippings protect and flavor the meat below
- The meat develops maximum flavor while retaining moisture
This technique turns cheaper, tougher cuts into superior dishes because of their higher collagen content. Braising delivers delicious results while being budget-friendly.
Selecting the Right Cut for Braised Pork
The right cut of pork can make your braising experience amazing. You’ll find several budget-friendly options that taste fantastic when braised the right way.
Best Pork Cuts for Braising
Pork shoulder stands at the top of the braising game. Two particular sections deserve special mention:
- Boston butt (also called pork butt): The upper shoulder part brings excellent fat marbling and a uniform shape
- Picnic shoulder: This thinner end has less fat but still braises beautifully
Country-style ribs are another fantastic choice. These tender, meaty cuts come from the upper rib cage and the fatty blade end of the loin. Spare ribs and St. Louis ribs work great too. They give you that perfect, fall-off-the-bone texture everyone loves.
Pork belly shines as an alternative because of its rich fat content. Any tough cut with plenty of connective tissue will turn tender and delicious during braising.
What to Look for When Buying Pork for Braising
Look for meat that shows good marbling throughout. This fat distribution melts while cooking and bastes the meat naturally from inside. Quality pork should have a pinkish-red color that shows its freshness.
Your pork shoulder should have an even shape to cook uniformly. While fat adds flavor, you can trim away any thick outer layers. Both bone-in and boneless cuts deliver great results – pick what suits your recipe best.
How Much Pork to Purchase Per Serving
Boneless and bone-in cuts need different portion planning. Plan for ¼-⅓ pound (125-160g) of boneless pork per person. Bone-in portions should be larger at ⅓-½ pound (170-250g) per person. Some sources suggest ¾ pound per person.
Pork shoulder shrinks about 40% during cooking as moisture evaporates and fat melts away. To figure out how much raw pork you need, divide your serving count by 4 for cooked weight, then divide that by 0.6.
Add a couple extra pounds if you’re hosting a special event or want leftovers. Braised pork tastes even better the next day after the flavors have had time to develop.
Essential Equipment for Perfect Braised Pork
The right equipment makes a huge difference when you want to make amazing braised pork. Your choice of pots and tools will affect your final results, so picking the right equipment is a vital first step in your cooking adventure.
Dutch Ovens vs. Slow Cookers
Dutch ovens are maybe the best choice for braising pork. These heavy, enameled cast iron pots do a great job at both searing and slow cooking. They’re perfect for braising because they hold and spread heat really well, which gives you steady cooking from start to finish. A good Dutch oven can handle high stovetop heat for searing and moves easily to the oven for slow cooking.
Slow cookers bring their own benefits to the table. They work great for busy cooks who want to “set it and forget it.” Dutch ovens let you do it all – braise, fry, roast, sear, sauté, bake, simmer, and boil. We used slow cookers mainly to make saucy, brothy dishes like stews and braised meats.
Here are the main differences:
- Flavor development: Dutch ovens give you proper searing, which builds deeper flavors through the Maillard reaction
- Moisture retention: Slow cookers keep more moisture than Dutch ovens
- Temperature control: Dutch ovens work with different heat levels, while slow cookers keep a gentle, steady heat
- Convenience: Slow cookers win here – you’ll come home to a ready meal
Other Tools You’ll Need
A few more tools will help you make better braised pork:
A sharp knife and sturdy cutting board are the foundations of good prep work. A quality cutting board—especially a big wooden one—gives you plenty of room to work with your ingredients.
Gravy separators will change how you make your sauces. These smart tools look like a mix between a tea kettle and measuring cup, and they’re the quickest way to separate fat from your precious braising liquid.
Big cuts of meat that don’t fit in your Dutch oven need either a large stock pot (about eight quarts) or a stovetop griddle to sear them first.
Your cooking style and priorities should guide your equipment choices. This is a big deal as it means that your braised pork will have that perfect melt-in-your-mouth texture.
Step-by-Step Braising Process
The real magic of braising pork lies in how you execute each step. Let me walk you through the significant steps that will help you achieve that coveted melt-in-your-mouth texture.
Preparing Your Pork
You should pat your pork really dry with paper towels. This small step makes a huge difference in getting proper browning. Season the meat generously with salt and pepper—about 1 tablespoon kosher salt works well for a standard pork shoulder. The best results come from seasoning up to two days ahead and refrigerating until you’re ready to cook.
Large cuts should stay whole or be cut into substantial chunks (at least 4 inches). Bone-in pork needs to be cut around the bone into two large pieces.
The Crucial Browning Phase
The Maillard reaction during browning creates depth and develops countless new flavors. Your Dutch oven needs oil heated over medium-high heat until it shimmers before adding the pork. Each side needs patient searing until deeply golden brown, which takes about 10-15 minutes total. This step demands your patience—proper browning creates essential flavor development.
Building Your Braising Liquid
Once you remove the browned pork, sauté aromatics in that same pot. A flavor base emerges from onions, garlic, carrots, and celery. The next step involves deglazing with your choice of liquid—wine, apple cider, stock, or beer work beautifully. Equal parts cider and stock create perfect apple cider braised pork.
Add your favorite herbs like thyme, bay leaves, and aromatics. The liquid should come halfway up the meat’s sides—we want to braise, not boil.
Temperature and Timing Guidelines
A preheated oven at 300-325°F awaits your covered pot. This sweet spot temperature maintains a gentle simmer without losing liquid too quickly. Most pork shoulders need 2½-4 hours to become fork-tender. The meat should be turned every 30 minutes for even cooking.
How to Tell When Your Braised Pork is Done
Your thermometer won’t help here—braised pork reaches perfection at “fork tender.” A simple fork insertion and slight twist should make the meat pull apart effortlessly. More cooking time helps if there’s resistance. While the USDA suggests 145°F for safety, properly braised pork typically reaches 205°F, where collagen breaks down completely.
Conclusion
Braising is a reliable way to turn simple pork cuts into unforgettable meals. Patient cooking and the right technique can transform budget-friendly cuts into dishes that rival restaurant quality and will wow your family and friends.
The magic happens in the details – detailed meat prep, proper browning, liquid control, and steady temperatures make all the difference. Time does the heavy lifting as tough tissues break down into rich, gelatin-filled goodness.
This detailed guide will help you become skilled at braising pork. Pick a nicely marbled pork shoulder, get the right equipment, and stick to our step-by-step process. You’ll soon be serving fork-tender, deeply flavored pork that melts right in your mouth.


